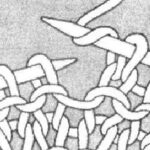
The purpose of a provisional cast on is to keep the cast-on stitches live so you can come back to them after knitting the main stitches. This is great if you want to add a border or neckline after you have knitted the body, or for a double-ended scarf where you want both ends to be the same. As with any cast on, it can be used to knit back and forth or in the round. However, the loops created from the provisional cast on sit between the stitches, so are not quite inline with the original stitches. This can mean that either you end up with one stitch fewer, or that all the stitches lie half a stitch along from the original stitches – so be careful to count how many stitches you have once you start knitting in the opposite direction. You can always add an additional stitch to correct the stitch count at the end which has the stitch missing. This slight step of stitches shouldn’t make much difference unless you are working in colors, textures or lace. In those cases, you may have to work a few rows of stocking stitch to hide the step.
Lace Cast On
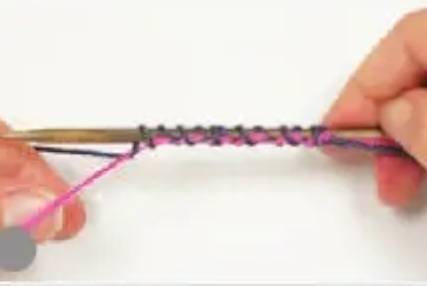
This method uses the working yarn and scrap yarn. It’s best to use scrap yarn that contrasts with your working yarn so you can see it more easily. If you are likely to cast on tightly, use a slightly bigger needle to cast on, but remember to change this once you start knitting. Alternatively, you can spread your stitches out as you work. The advantage with this method is that you can swap out the scrap yarn fo ra circular needle cable. That way, your stitches are all ready to be worked and don’t even need to be moved on to a needle,
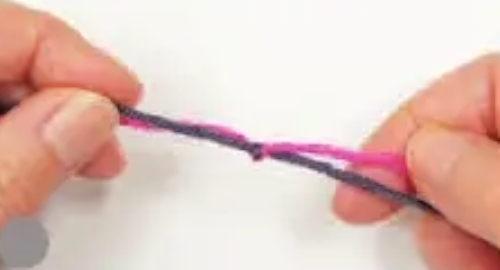
1. Knot the working yarn with the scrap yarn.
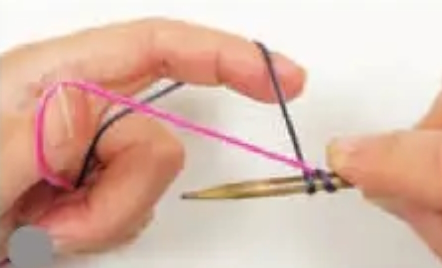
2. Hold the yarns in the slingshot position so the scrap yarn (shown here in pink) is around your thumb and the working yarn is around your forefinger. Secure the knot with your left fingers, anchored against the needle. I prefer the knot to be under the needle, as shown.
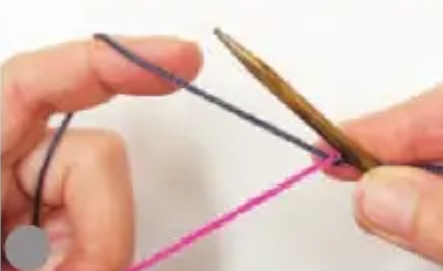
3. Move the tip of the needle as if to work ayarn over with the working yarn, the yarnthat is wrapped round your index finger.
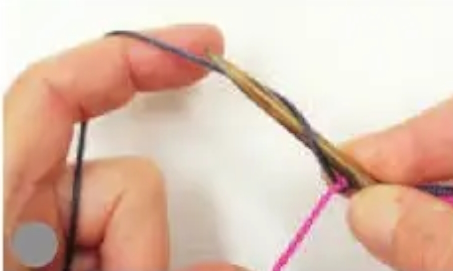
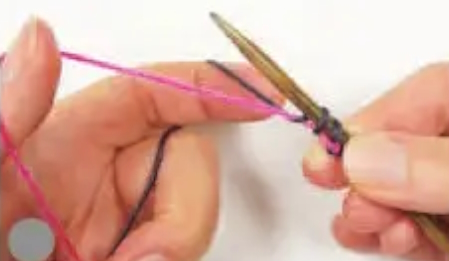
4. Now bring the tip of the needle to the front by taking it over the top of the scrap yarn, then down under the scrap yarn, then up between the two yarns in the middle. It looks like the scrap yarn is around the needle.
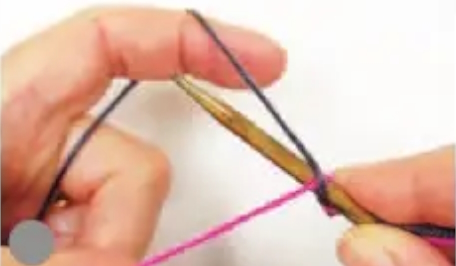
5. Take the needle tip behind the working yarn and bring it up at the very front, so it captures both the working yarn and the scrap yarn. Now the scrap yarn runs through the stitch at the bottom of the needle. If you end up with a scrap yarn stitch on the needle, undo and work it again! There should be no scrap yarn stitches on the needle.
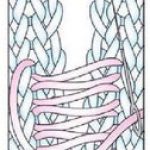
6. The stitch is now on the needle, with the scrap yarn running along the bottom. Keep repeating steps 2-5 until you have enough stitches.
7. All the required stitches are on the needle, with the scrap yarn running along the bottom. Note that the working and scrap yarns are twisted at the end of the last cast-on stitch. Keep hold of the yarns so that twist stays when starting the next row, to stop all the stitches unravelling.